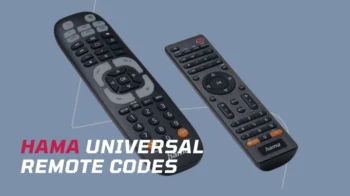
Sony universal remotes are preprogrammed to operate popular Sony devices, making them ready to use striaght out of the box. To operate other brands’ devices, you need to program the remotes by entering device codes, performing an automatic code search, or learning functions from the original remote.
Below, I’ll walk you through programming your Sony universal remote, from finding the correct setup codes to performing code entry, code search, and learning functions, with step-by-step instructions for different models.
Contents
Sony Universal Remote Codes
The 5-digit Sony remote codes for common TV brands are listed below:
- Broksonic: 00463, 00236, 01935, 01463, 01892
- Daewoo: 01661, 00451, 00154, 00180, 00661
- Haier: 01748, 01756, 01749, 02434
- Hisense: 00748, 01756, 00818, 01314, 02434
- Insignia: 01564, 01756, 01423, 02434
- LG: 01423, 01756, 02358, 02434, 01447
- Philips: 01454, 01867, 01756, 00054, 02434
- Samsung: 00812, 00702, 01243, 00178, 00154
- Sharp: 00818, 01756, 00093, 02434
- Toshiba: 01524, 00154, 00156, 01256, 00650
- Vizio: 01758, 00864, 00885, 01756
To find more codes, use the code lookup tool below.
Sony Universal Remote Code Lookup Tool
Code Type
Device Type
Brand
How to Program Sony Universal Remotes
The programming steps for Sony remotes vary for those using 5-digit codes, 4-digit codes, and kids’ remotes. Detailed instructions for all are provided below.
Programming Remotes That Use 5-Digit Codes

1. Direct Code Entry
- Hold SET for 3+ seconds until the LED lights up. While holding SET, press the desired device button (e.g., TV or DVD), then release both. The selected device button lights up.
- Enter the 5-digit setup code (which you found out from the lookup tool). The LED flashes 3 times, then turns off.
- Test commonly used buttons. If it doesn’t work, try the next code for your brand.
2. Code Search
- Hold SET for 3+ seconds until the LED lights up. While holding SET, press the desired device button (e.g., TV or DVD), then release both. The selected button lights up.
- Enter 992. The SET indicator flashes 3 times, signaling entry into setting mode.
- Hold ▶ (Play) to start code searching. If you go past the required code, use the Fast-Forward or Rewind buttons to search for the next or previous code, respectively.
- Press + (OK button) to exit search mode. The LED flashes 3 times and turns off.
Notes:
- Press SET to cancel the process anytime.
- If all codes are cycled, the LED and selected button flash once and turn off.
- If the LED flashes once and turns off, the setting is incomplete.
- If the code works partially, repeat the process to find a better match.
3. Learning Functions
If your remote supports learning, such as the RM-VLZ620, you can program it with functions from your device’s original remote control. This feature allows you to assign functions to any button (excluding SET) for any device mode.
To learn functions from the original remote, use these steps:
- Place the universal remote 3 to 8 cm from the device’s original remote, head-to-head.
- Hold SET for 3+ seconds. While holding SET, press + (OK), then release both. The selected device button lights up.
- Now, enter 988. The LED flashes 3 times, indicating the entry to learning mode.
- Press the device button (e.g., TV) for the desired device. The selected button lights up.
- Press the button on the universal remote you want to teach. The LED flashes with the button press.
- Press the corresponding button on the original remote. During signal transfer, the LED stays lit, and the device button turns off. Once complete, the LED flashes 3 times. A single flash indicates failure.
- Repeat steps 4 to 6 to teach additional functions.
- Press SET to exit learning mode. The LED turns off.
To clear a learned function from a button:
- Hold SET for 3+ seconds. While holding SET, press + (OK), then release both.
- Enter 904.
- Press the desired device button.
- Press the button you want to reset.
- Press SET to clear the function and exit.
Notes:
- While learning a function, you can press SET at any time to cancel the process.
- Learned functions remain active even after setting a manufacturer’s code.
Programming Remotes That Use 4-Digit Codes

1. Direct Code Entry
- Press and hold the SET button, and then press MENU. The LED will light up and release the buttons.
- For RM-V302 and RM-V402: Hold the SET button and then press the POWER button.
- For RM-EZ4 and RM-V210: Press the SET button for 3 seconds.
- Press the desired device button (like TV or DVD). The selected button will light up.
- Enter the code for your particular device.
- Press the ENTER (or ENT) button to finish programming. The LED and device button will turn off.
- Test a few commonly used buttons on the remote. If it doesn’t work, try the next code for your device.
2. Code Search
- Hold SET and press MENU. Release both buttons when the LED lights up.
- For RM-V302 and RM-V402: Hold the SET button and then press POWER.
- For RM-EZ4 and RM-V210: Press the SET button for 3 seconds.
- Press the desired device button. The selected button will light up.
- Press CH+ (or CH-) and Power alternately until the device responds (e.g., the TV turns off or a CD player starts playing).
- When the device responds, press ENTER to exit and save the code. The LED and device button lights will turn off.
- Test the common button on the remote. If some buttons don’t work, repeat the process with the next until you find the most compatible code.
3. Learning Functions
The learning function is available only on select models, such as the RM-VL600, RM-VL600T, RM-VL610, RM-VL610T, and similar models.
To learn a function from the original remote, follow these steps:
- Place the universal remote head-to-head with the original remote, about 5 to 10 cm away.
- Hold SET for 3 seconds. The LED indicator will flash.
- Press the desired device button. The selected button will light up.
- Press the button on the universal remote you want to teach. The LED will flash.
- Press and hold the corresponding button on the original remote until the device button lights up again.
- Repeat steps 4 and 5 to teach additional functions.
- When finished, press SET to exit learning mode.
Programming The Kid’s Remote

To program a Sony RM-KZ1 or RM-KZ1T Children’s Remote Control, first remove the setup button cover. Use a screwdriver to loosen the screw, slide the cover, and then lift it off.
1. Direct Code Entry
- Hold SET and press the numeric button 1. Release both buttons when the LED lights up.
- Enter the code for your TV or Set Top Box using the numeric buttons. The LED will flash 3 times and turn off.
- Test the remote. If it doesn’t work, try the next code for your brand.
2. Code Search
- Hold down SET and press the ‘2‘ button. Release both buttons when the LED lights up.
- For TV, press the ‘0‘ button. For SAT/Cable/IPTV, press ‘1‘.
- Press ENT. The LED will flash 3 times.
- Press and hold ENT to start searching. When the device turns off, release the button.
- If you go past the working code, press ‘1‘ or ‘2‘ to search for the next or previous code, respectively. To continue searching, press and hold ENT.
- Press SET to exit code search and save the code. The LED will flash 3 times and turn off.
- Test the remote. If the device isn’t working as expected, repeat the process to find a better code.
3. Assigning Channels
To make channel selection easier, you can assign a TV or Set Top Box channel to a favorite button (1 to 7). This allows your child to quickly access their favorite channels with a single press.
To assign a channel to a favorite button:
- Hold the SET button and press ‘3‘. Release both keys, and the LED will flash 3 times.
- Press the favorite button you want to assign the channel to (any one from 1 to 7).
- Enter the desired channel number using the numeric buttons.
- Press ENT. The LED will flash 3 times. To assign more channels, repeat steps 2 to 4. You can set up to 7 favorite channels.
- Press SET to finish. The LED will turn off.
To conclude, these are the different programming methods for Sony universal remotes. Follow the one that suits your model and let me know how it worked for you. If you have any questions, feel free to ask me via comments.


